User Guide
Step 1 —Connect HubSpot
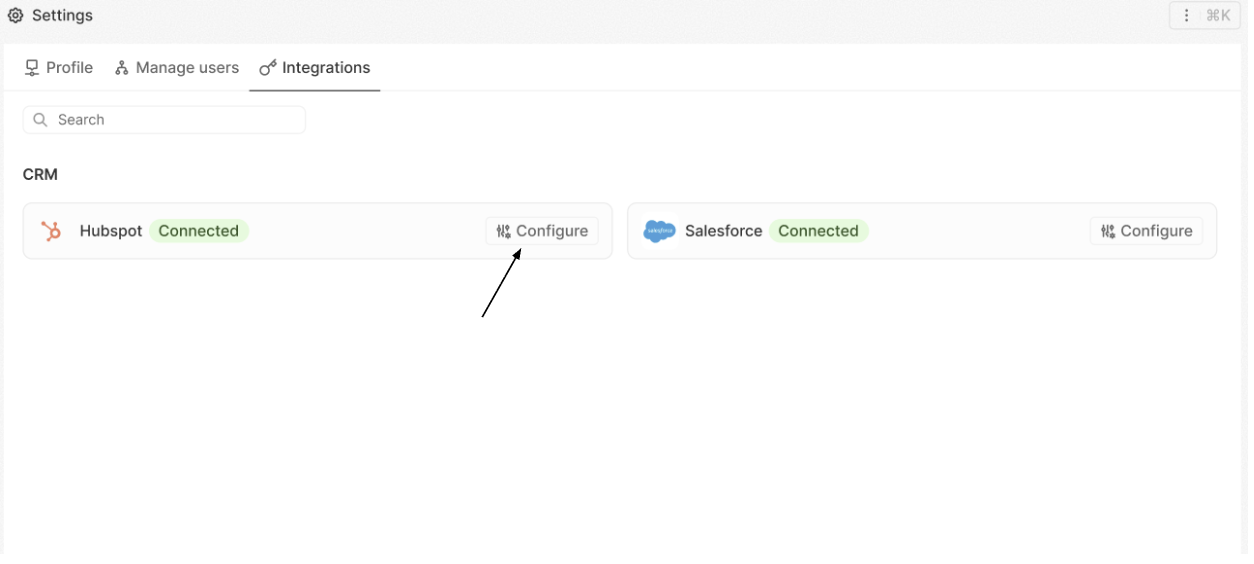
Navigate to Settings in the side navigation and open the Integrations tab.
From the Integration panel, select HubSpot and click + Connect, then sign in and authorize access to complete the connection.
Step 2 —Account Confirmation
Once authentication is complete, HubSpot will show a green Connected status on the Factori Integrations page.
Click Configure to proceed with data setup and field mapping.
Step 3 —Data Import
Inside the HubSpot configuration panel:
- Click Pull Data → imports contact records
- Click Sync Properties → retrieves HubSpot metadata

Step 4 —Field Mapping
Map your HubSpot properties to Factori fields, ensuring at least one unique identifier is selected from the available options given below.
Once mapping is complete, click Save to apply the configuration. You can also click Reset at any time to clear and reconfigure the field mapping.

Step 5 —Select Enrichment
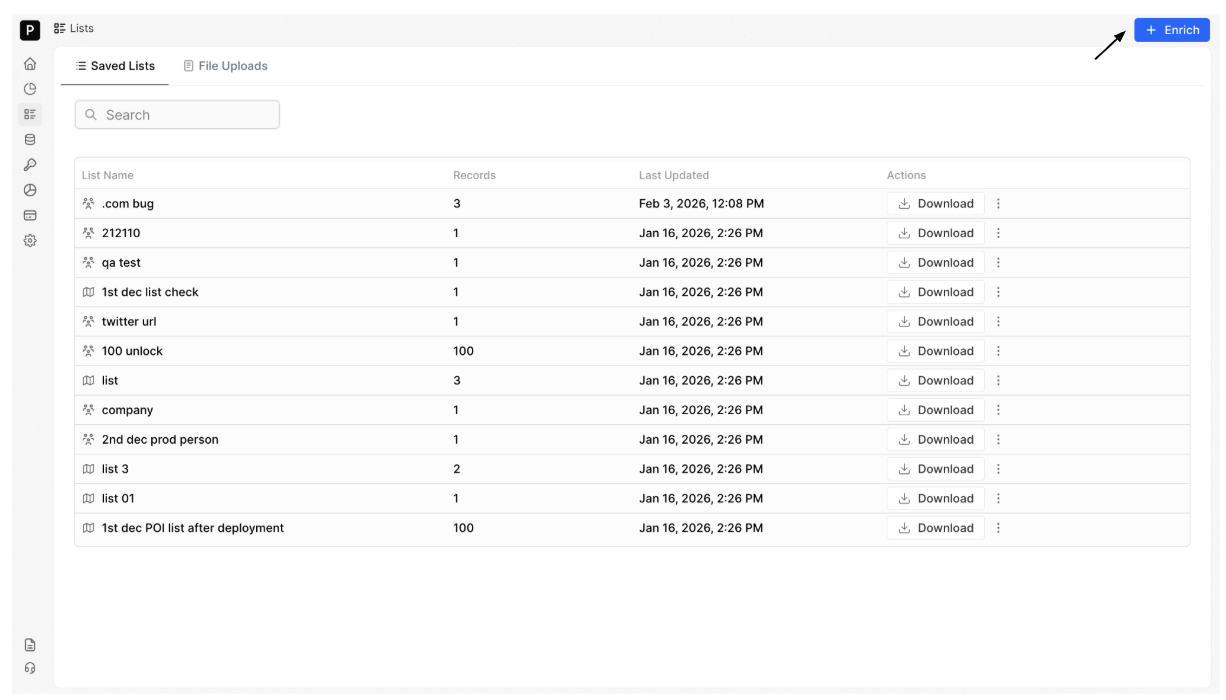
Navigate to the Lists module, click + Enrich, and choose HubSpot as the source.
In the dialog box that appears, select Manual Enrichment and click Confirm to continue. [Scheduled Enrichment will be available soon]
Step 6 —Select Contacts to Enrich
Choose either All Contacts or Segments (HubSpot Lists) for enrichment.
- Option A — All Contacts - Enrich all imported records.
-
Option B — Segment (HubSpot List) - Use dropdown to select a specific HubSpot list.
Note: Previously imported lists will appear greyed out to prevent duplication.
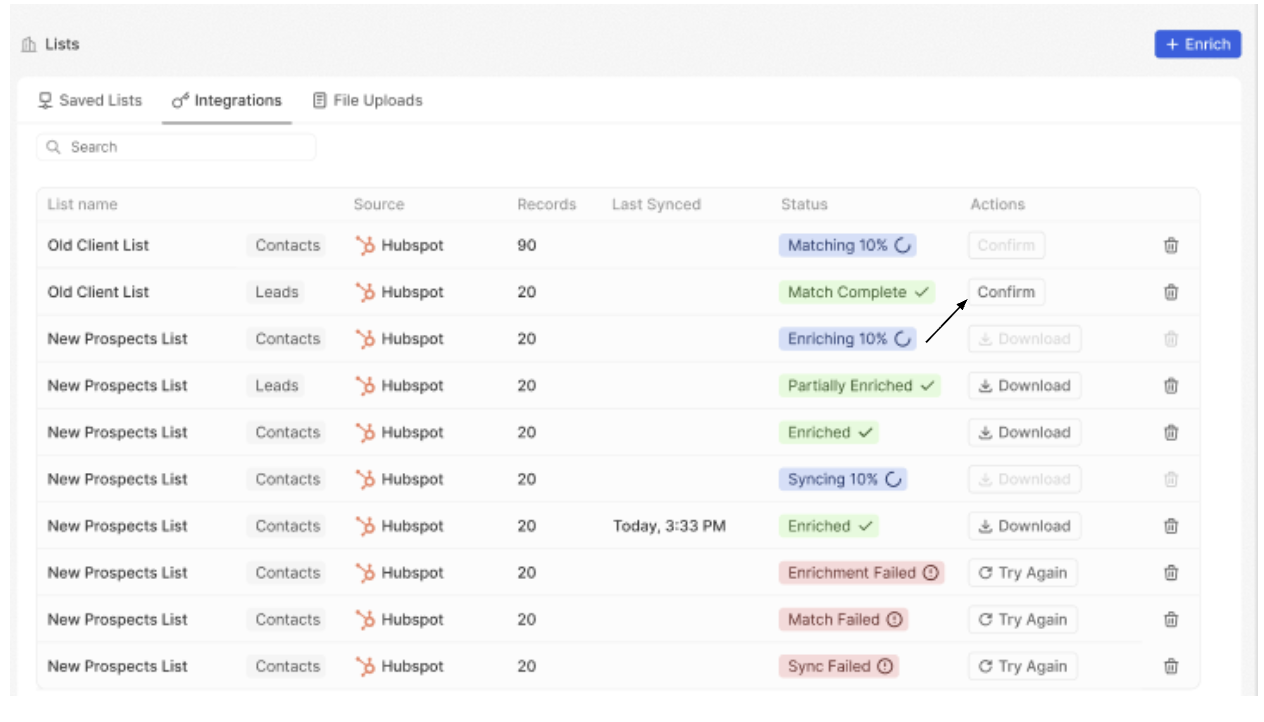
Step 7 —Monitor Matching Progress
Under the Integrations tab in the Lists module, you will see the Matching status.
Once finished, it will change to Match Complete. Click Confirm to proceed further.
| Status | Meaning | |
|---|---|---|
| Matching | Identity resolution in progress | |
| Match Complete | Matching finished |
Step 8 —Review Credits & Run
After your confirmation is provided, the Run Enrichment popup will appear.
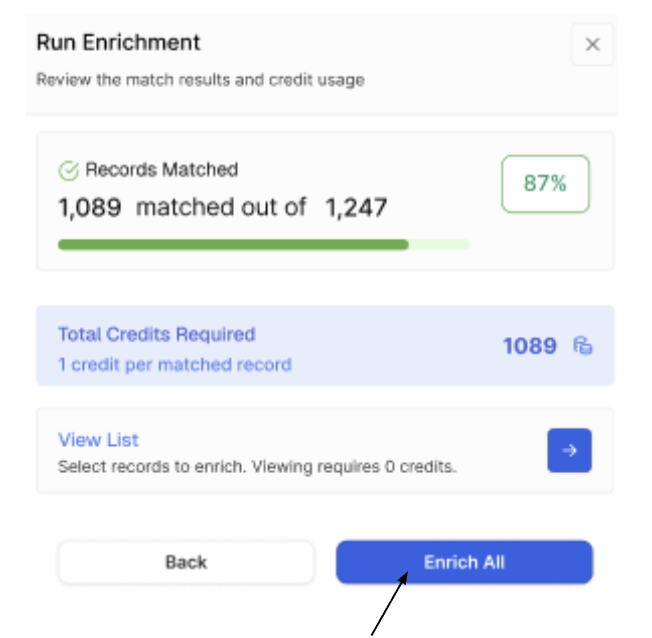
The confirmation model provides full visibility into credit usage before execution, including:
- Required Credits – Total credits needed for the selected records
- Available Balance – Remaining credits in your account
You can then choose:
- Enrich – Start the enrichment process
- View List – Review the selected records before proceeding
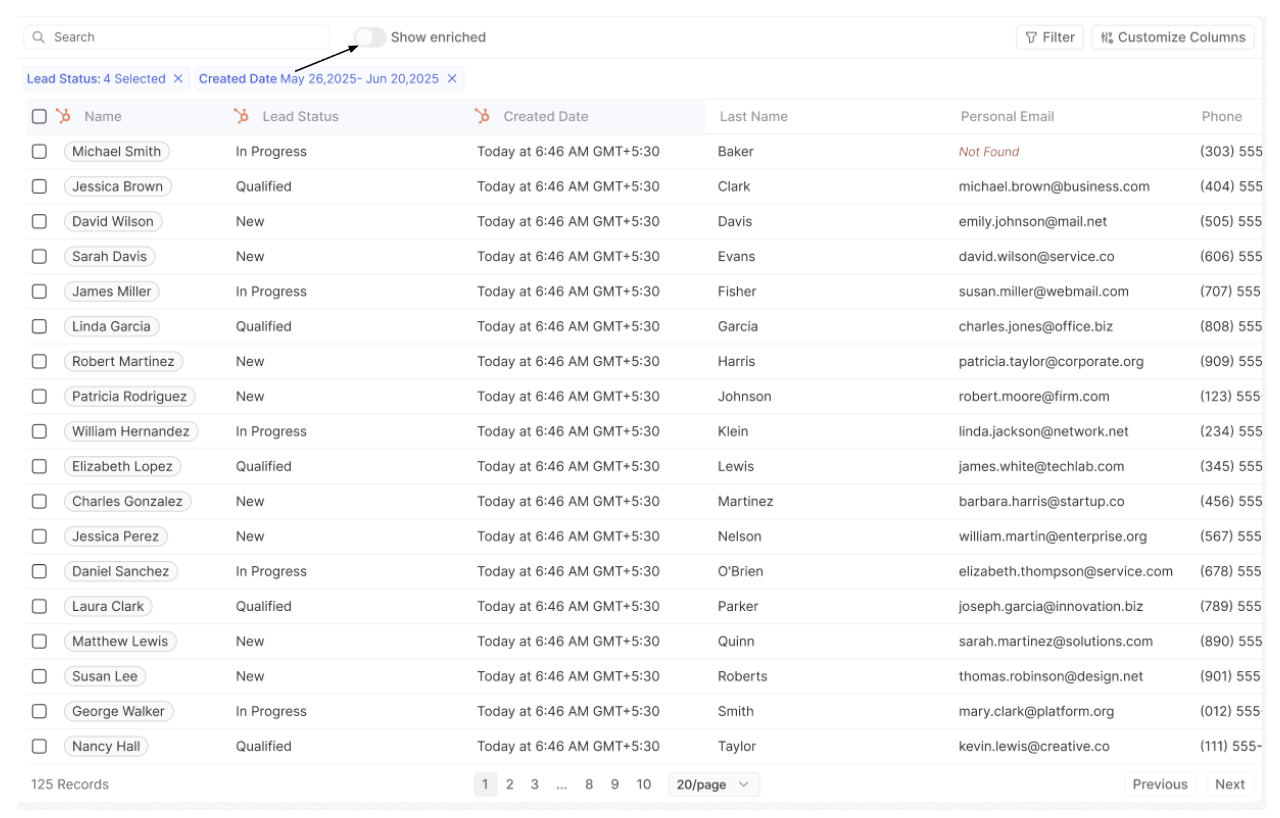
Step 9 —Review Credits & Run
Once records are displayed in the table view, you can manage enrichment at a granular level:
-
Selective Enrichment – Select specific rows and click Enrich to process only those contacts.
-
Show Enriched Only – Enable this toggle to display only successfully enriched records and hide unmatched entries.
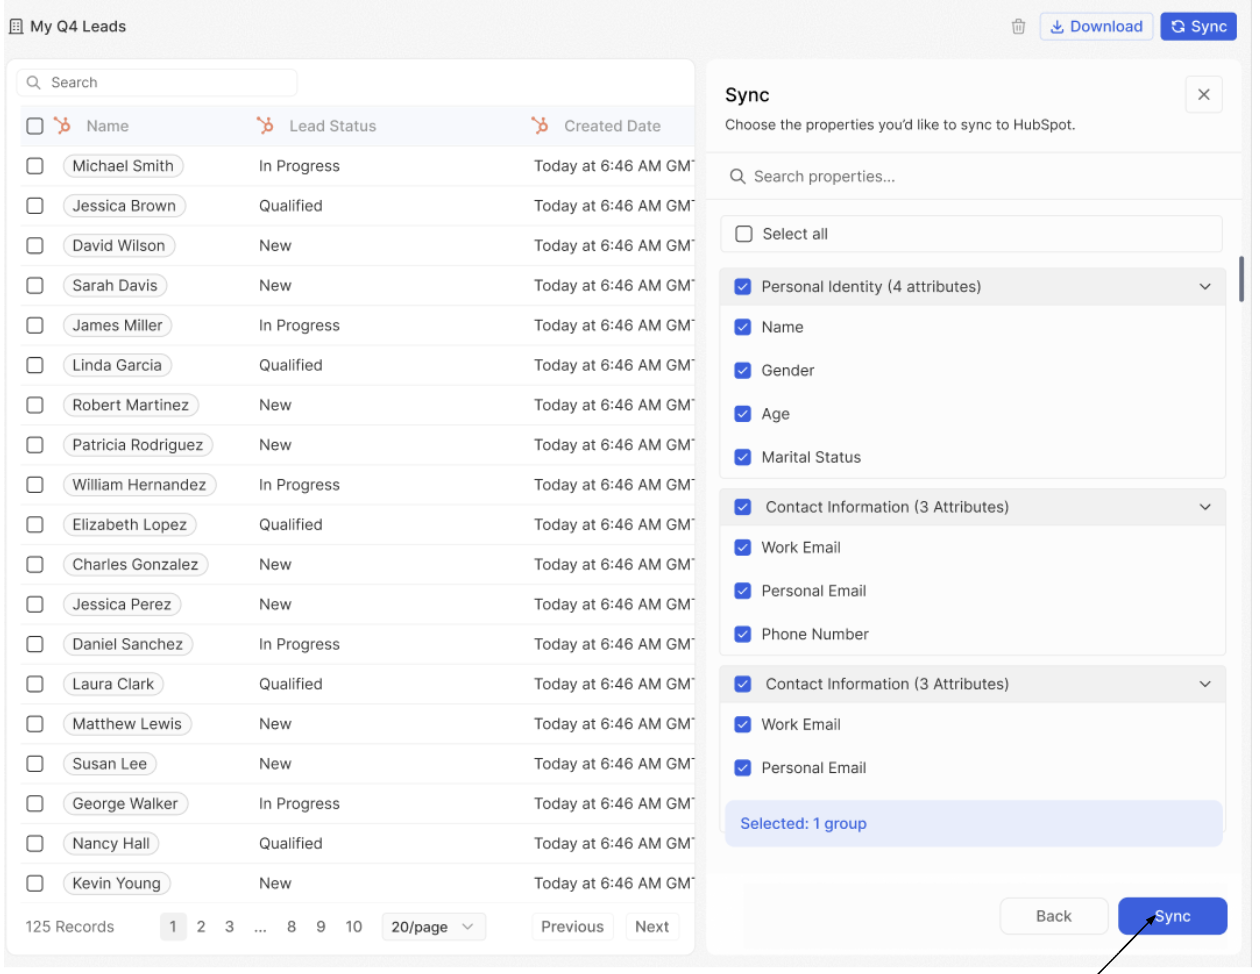
Step 10 - Sync back to Hubspot
Click Sync and choose the Factori fields you want to push to HubSpot.
New properties will be created in HubSpot and existing data will never be overwritten.
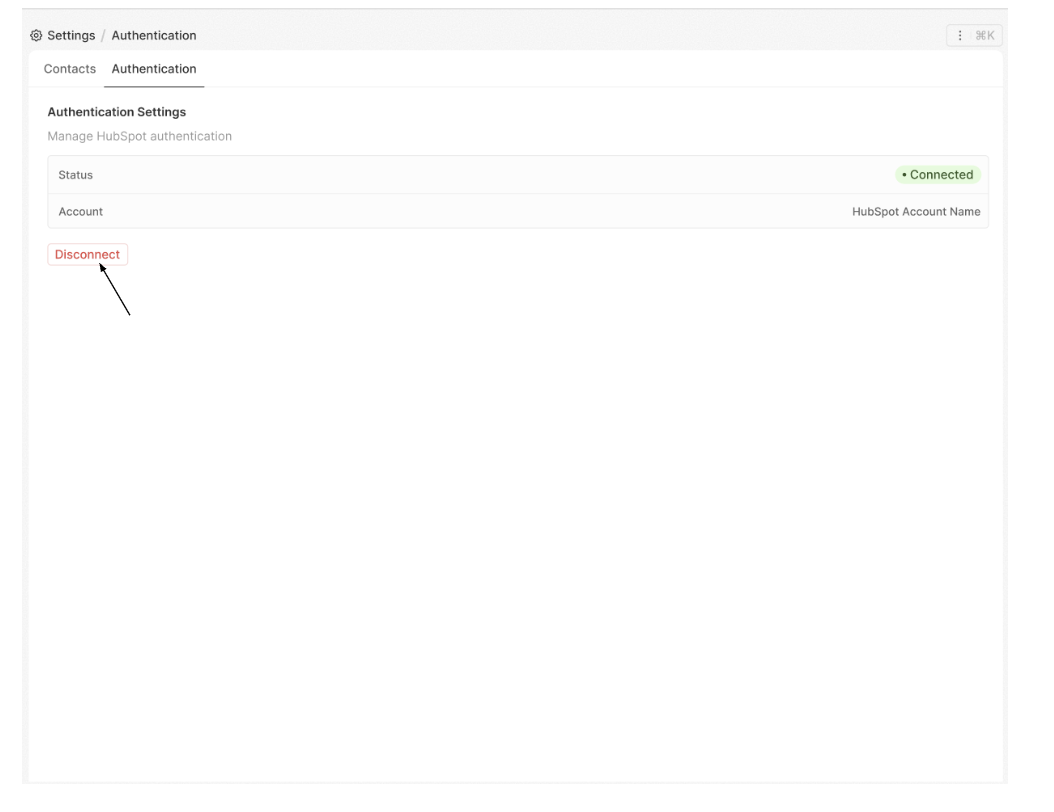
Step 11 -Disconnect HubSpot
To disconnect HubSpot, navigate to Settings > Integrations > Configure > Authentication and click Disconnect to remove the connection.